In every home there are simple home repairs a homeowner can do themselves. With a little knowledge, some basic tools and your own two hands, you can fix a toilet or change a filter. In the first of this two part series, let me walk you through some simple home repairs.
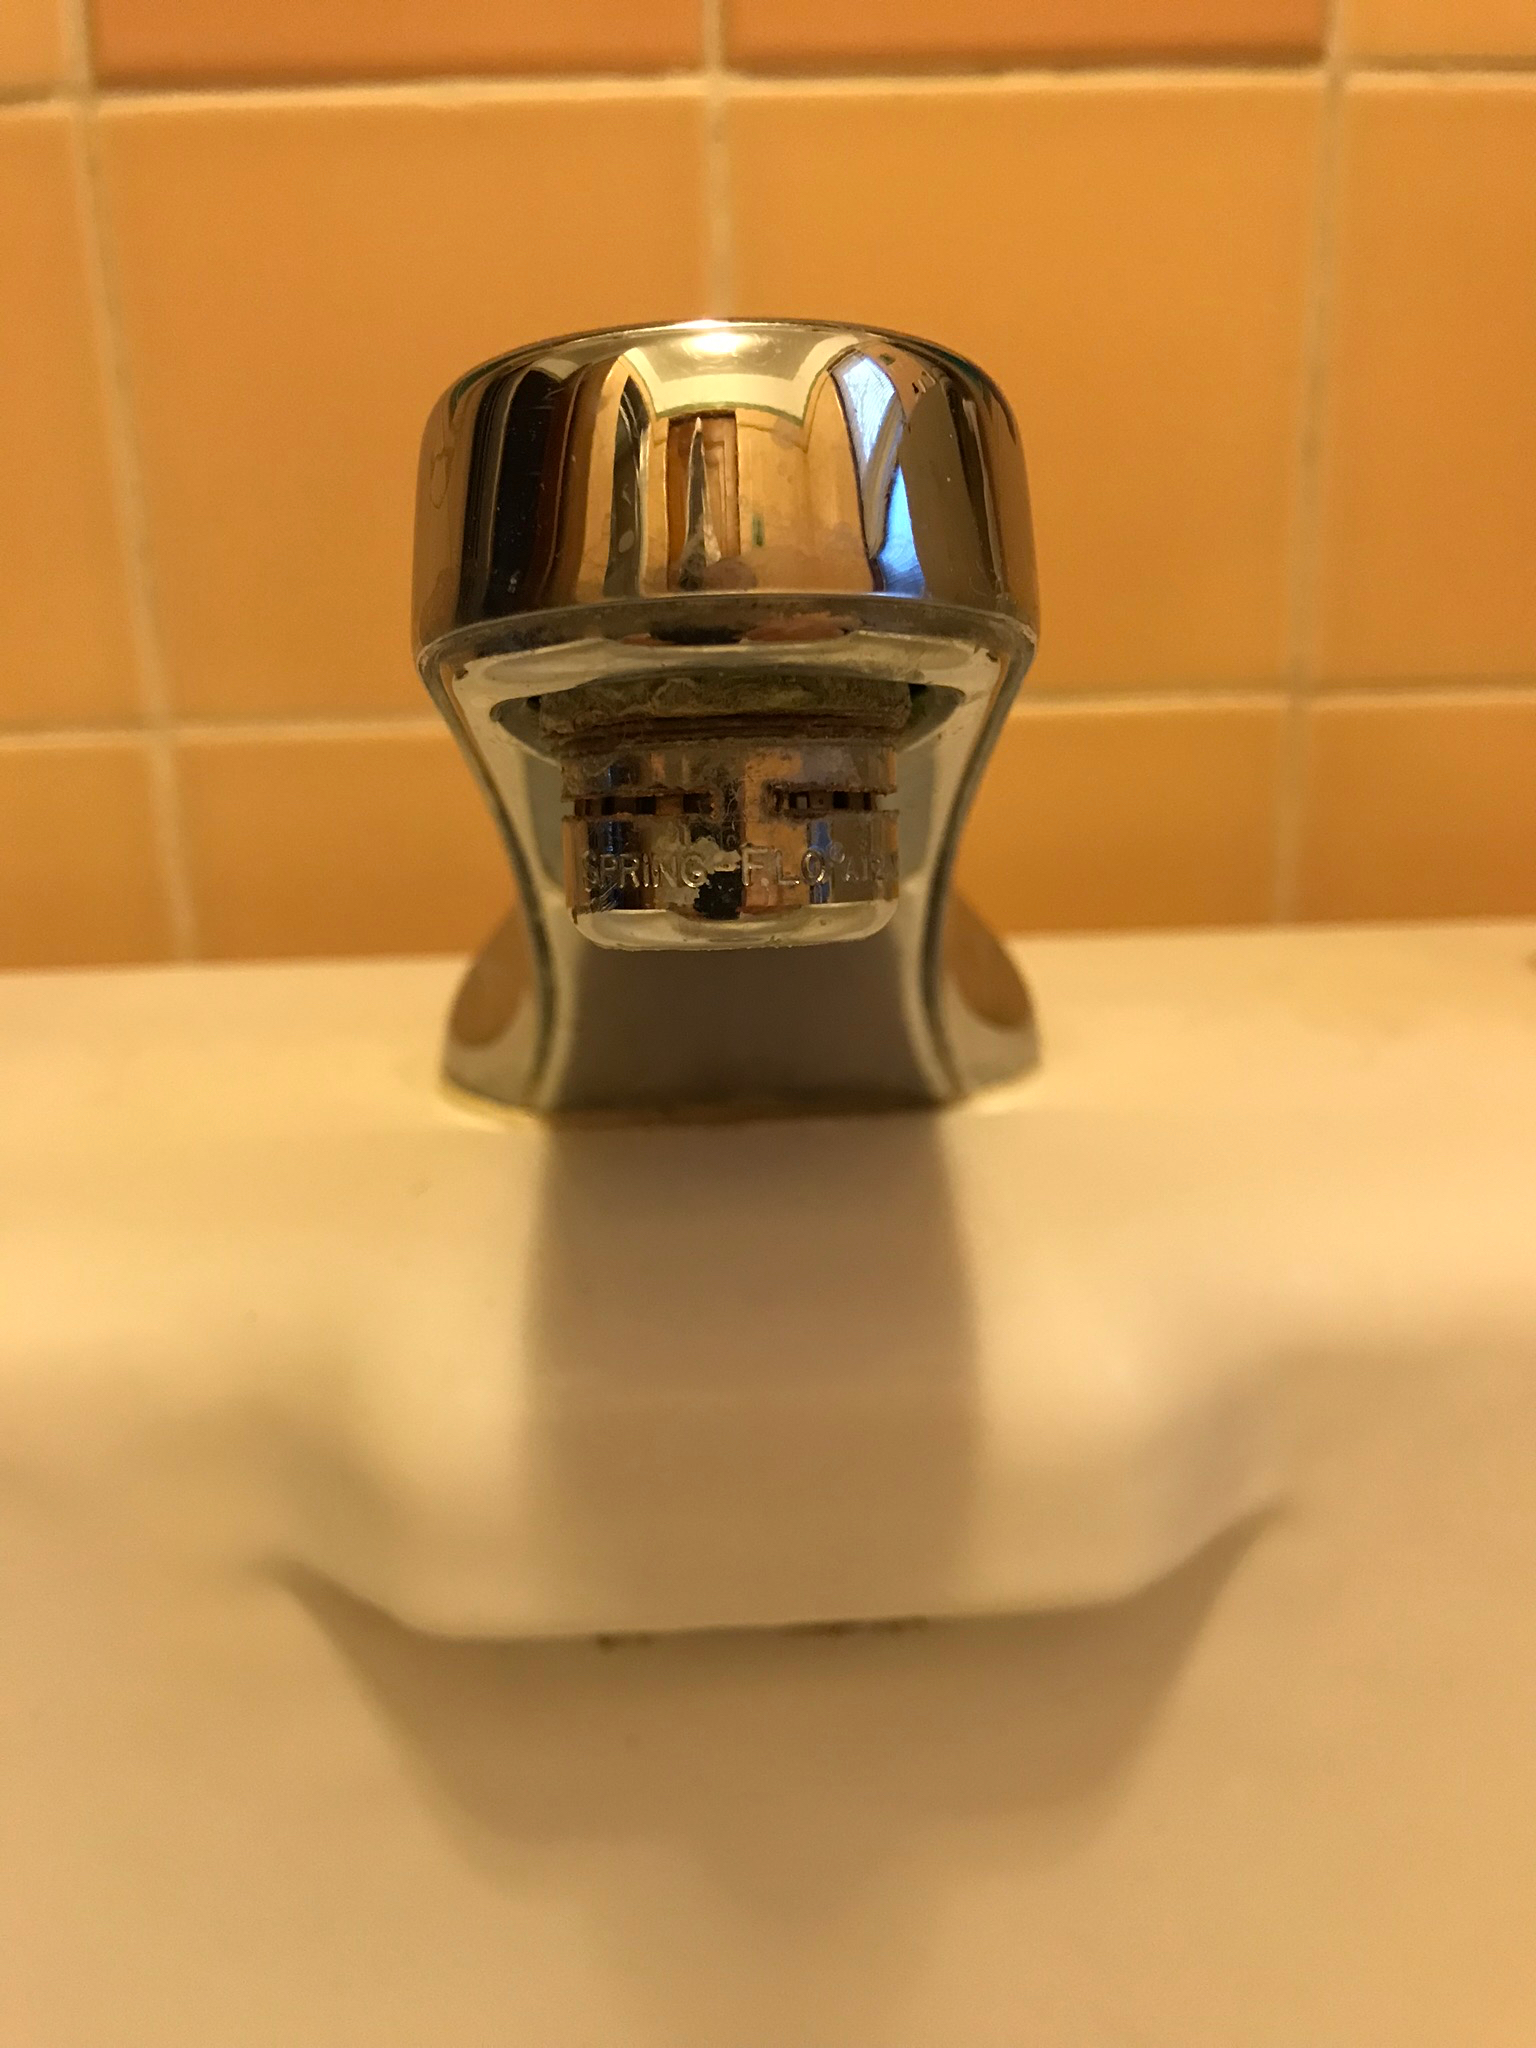
Do you have low water pressure from your sink? Check the aerator at the end of the faucet head. It may have debris stuck in the filter that is restricting the water flow. Here’s how to check this: With your hand, unscrew the aerator and clean out any debris that you see. If it is to hard to unscrew with your hand, use pliers with a rag around the aerator to protect the metal. After cleaning, screw the aerator back on with your hand until it is hand tight. Turn on the water to see if it is sealed well. If water is running over the top, tighten it some more. If you do accidentally damage the aerator in the repair process, bring in the damaged aerator to any hardware store and they can match it up for a new one.
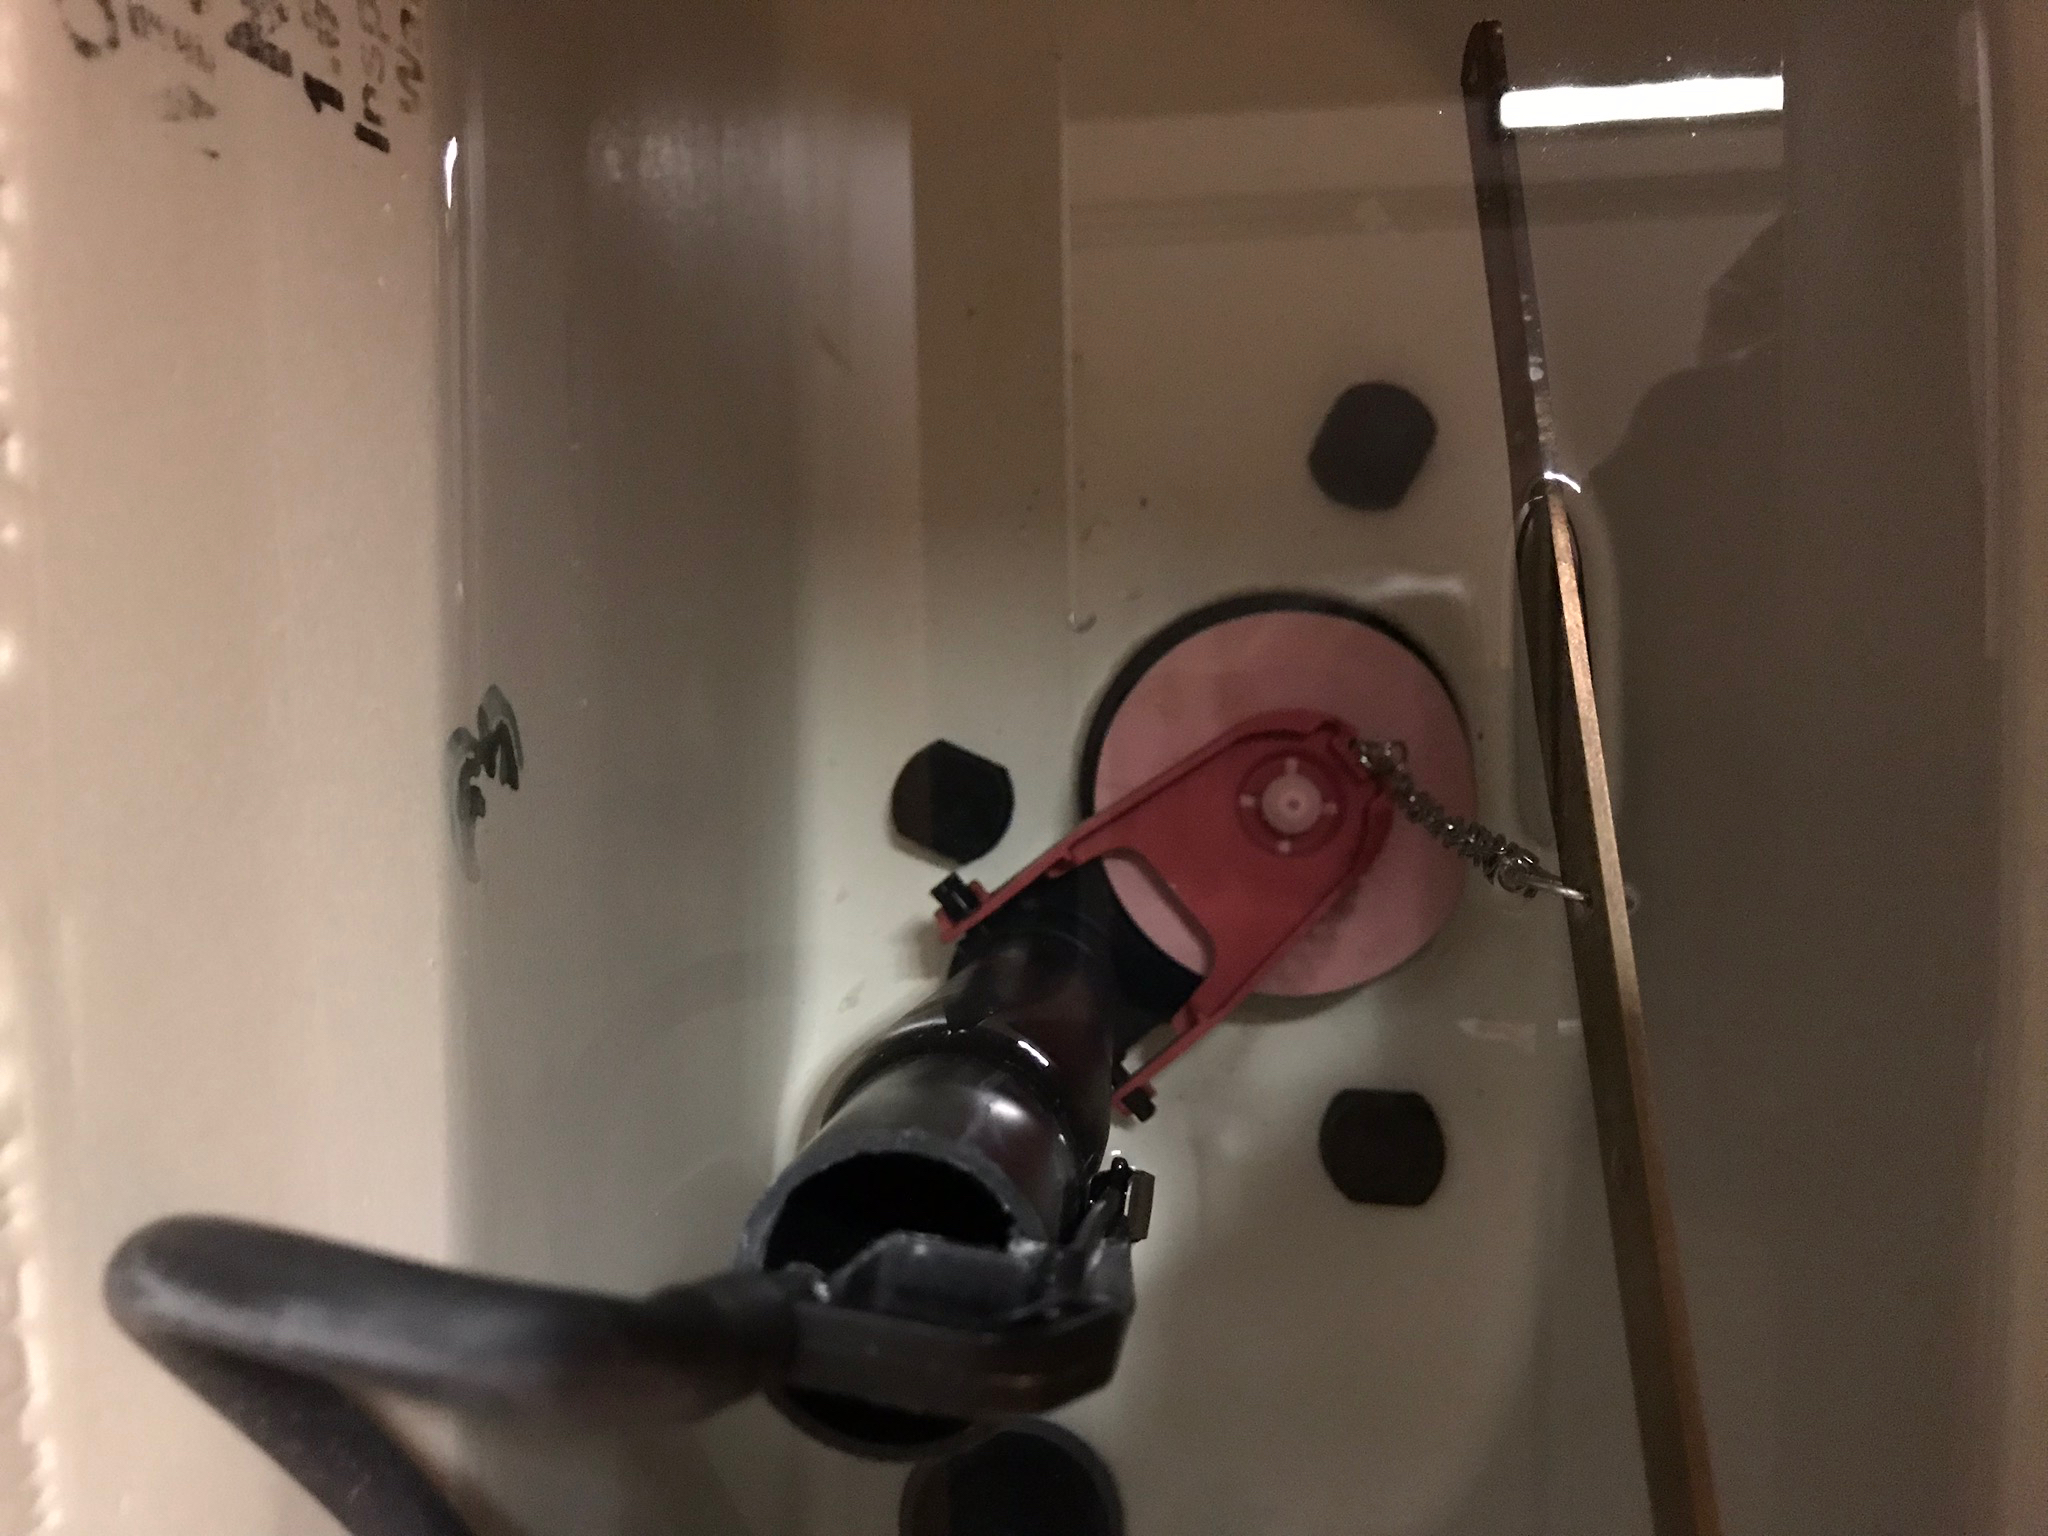
How about your toilets, have you ever had a running toilet? It might be that the flapper is not sealing in the toilet tank. You can buy new universal flappers at the hardware store. To change out the old one: Shut off the toilet’s water supply on the wall with your hand. Flush the toilet to let all the water drain out of the tank. Take the toilet tank top off and look into the tank. You should see a red flapper that is connected with a chain to the toilet handle. Remove the chain from the handle and reach down to the flapper in the bottom of tank. Most of the time the flapper clips or slides onto a couple of arms. Pull the flapper off these arms. Now take the new flapper and install in reverse. When connecting the chain back to the toilet arm make sure that the chain doesn’t have too much slack in it as too much slack may make the chain fall under the new flapper and stop it from sealing. Finally, turn the water back on and test the seal a couple of times.
Hopefully you found this to be helpful and will be better equipped to take on these home projects. If you need help with any of these projects or more, contact me!
Please like this post if you found it helpful or write me a comment below.
